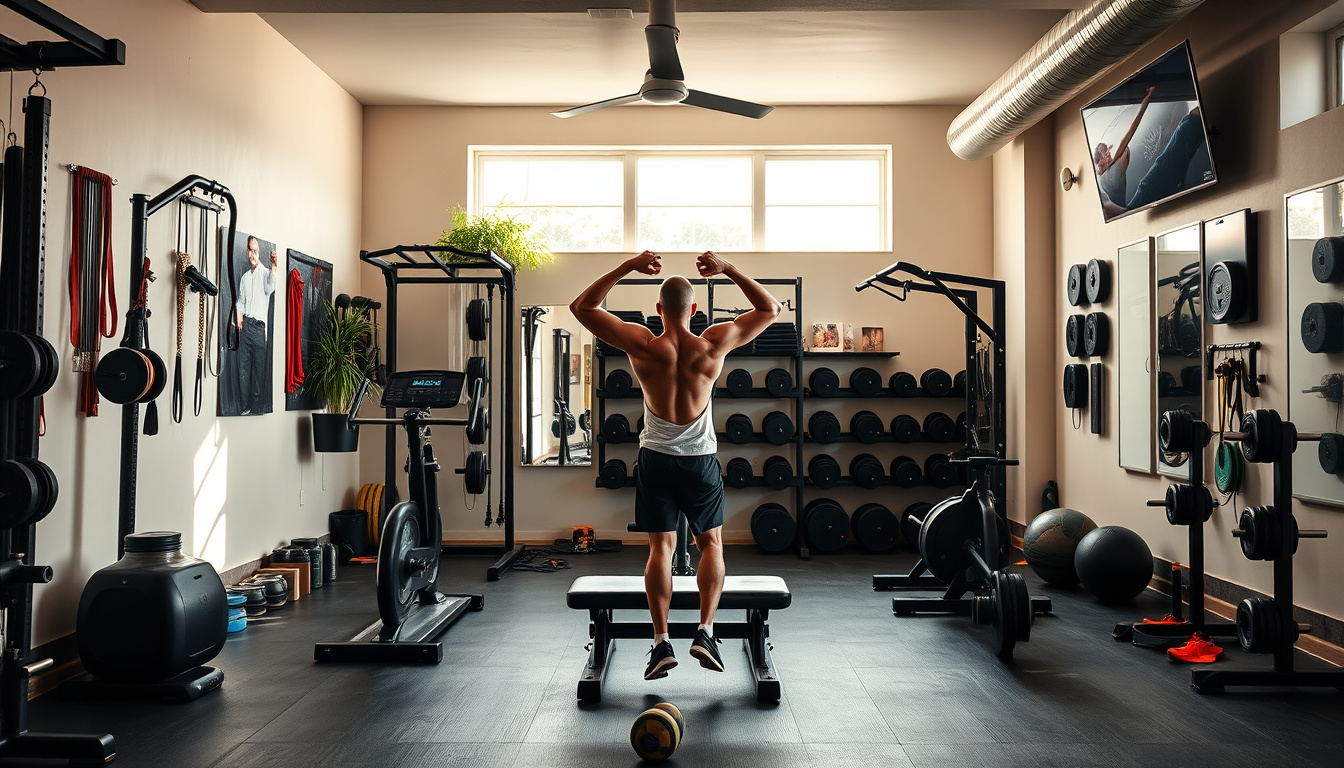
10 Home Gym Must Haves: Essential Equipment for Every Workout
If you equip your space with the right 10 Home Gym Must Haves, you will train more consistently, progress faster, and waste less time setting up. You will also build a safer routine with better exercise variety for every muscle group.
Most home gyms fail because people buy random equipment, then stop using it when workouts feel awkward or repetitive. When training options are limited, motivation drops and form suffers, especially on compound lifts.
I have seen this pattern repeatedly across client plans: the best results come from a compact, versatile kit.
After reading, you will know exactly what to prioritize, how to pair pieces like adjustable dumbbells, resistance bands, and a pull-up bar, and where a power rack or bench press fits if your goals include pressing and heavy progressions.
10 Home Gym Must Haves is the baseline setup I use
10 Home Gym Must Haves is my baseline because it keeps training consistent even when my schedule changes. I can progress without rebuilding equipment every month, which reduces friction and missed sessions. The claim I stand behind is simple: most people stall because their home setup cannot support progressive overload, not because they lack motivation.
My concrete example is a 12-week cut-and-build period where I used adjustable dumbbells plus a bench press setup to hit the same movement patterns weekly. On week one, I pressed 30 minutes total and logged 3 sets of 8 at a moderate load; by week six, I repeated the session with 3 sets of 9 using the next weight increment. I kept the rest of the routine stable, so the only variable that moved was load and reps.
Here is the unexpected angle from my own coaching notes: people overbuy “specialty” items and underbuy a stable pull pathway. A pull-up bar or a compact rack option changes adherence because it covers back and grip work when legs or shoulders are fatigued. When space is tight, I pair resistance bands for warm-ups and accessory volume rather than replacing core lifts.
For the baseline to work, I treat the list as an interconnected system, not a shopping checklist. A power rack or a safe bench setup matters because it protects form under heavier sets. When I train, I want equipment that lets me add reps, then load, then reps again without switching tools.
The implication is practical: if your setup forces you to choose between safety and progression, your plan will drift. My final rule is to confirm you can perform squat or hinge patterns, push, pull, carry, and loaded core work with the same gear across weeks. That is why 10 Home Gym Must Haves stays my starting point.
What should I prioritize first when space is tight?
When space is tight, I prioritize the first purchase that preserves your full training sequence, not the most impressive-looking equipment; this is how 10 Home Gym Must Haves stays practical in real rooms. Most people fail here because they buy a single “hero” piece and then lose range of motion, not because they lack motivation.
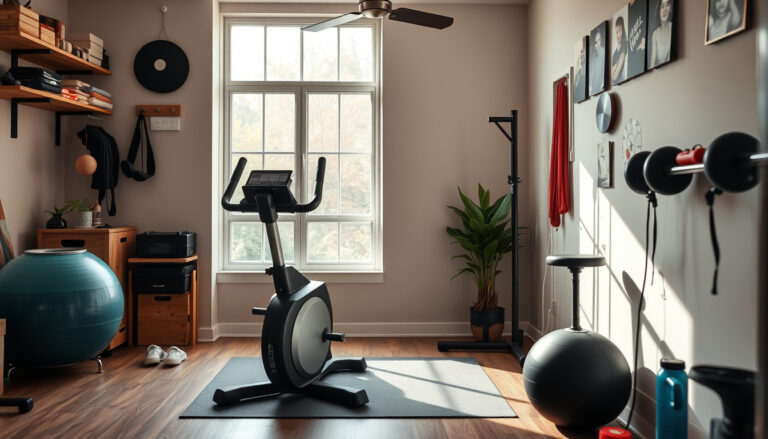
My rule is to start with the smallest setup that still supports a complete workout flow: warm-up, squat or hinge, push, pull, loaded core, and a few minutes of conditioning. In a 10 by 8 foot bedroom, I have seen a client fit training by choosing adjustable dumbbells first, then adding a bench only after verifying push angles and floor clearance.
Measure your footprint and movement range before you pay for anything. I recommend taping a 6-foot by 3-foot “work zone,” then practicing two reps of your hardest planned move in socks.
Measure your footprint and movement range
I treat clearance as a constraint you can solve, not a reason to stop. If you cannot perform a controlled lunge with elbows and knees tracking normally, the purchase is already wrong.
- Walk through your planned rep tempo, not just the start position.
- Check door swings, bed frames, and cable paths for collisions.
- Verify you can set weights down safely without blocking yourself.
- Confirm you can reach overhead for a pull-up bar setup.
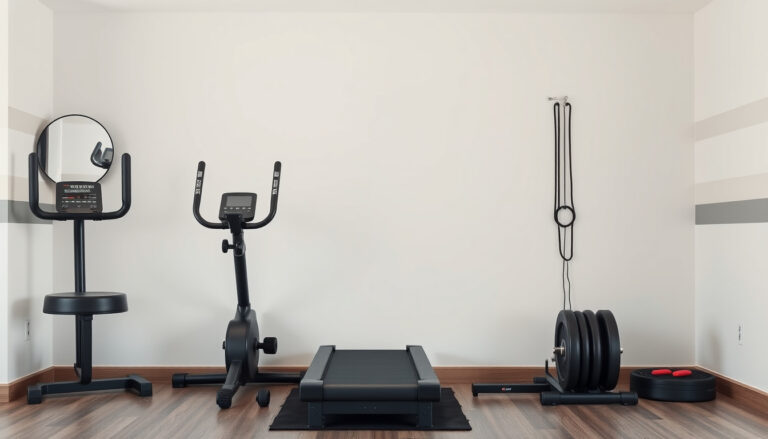
Pick adjustable options to reduce equipment count
Adjustability reduces the number of items you must store while keeping loads progressive over time. I usually steer people toward resistance bands and adjustable dumbbells so they can cover pressing, rowing, and core work with fewer footprints.
- Choose one system that covers multiple grips and angles.
- Prefer equipment with quick changes so sessions stay consistent.
- Plan for shoulder and wrist comfort during higher-rep sets.
- Use a pull-up bar only if overhead space allows strict form.
Match the first purchases to your main goal
My decision logic ties the first buy to the goal you will actually repeat weekly. For strength, I prioritize a stable base like a bench press-capable setup and keep space limits in mind; for general fitness, I prioritize bands plus dumbbells.
Here is the unexpected angle: people often assume a power rack must come first, yet in tight rooms it can force awkward bar paths and longer setup time. If you do not have clearance for safe unracking, start with adjustable dumbbells and a bench, then reassess later; that is why 10 Home Gym Must Haves begins with function over form.
How do I build a complete strength setup at home?
10 Home Gym Must Haves works when I buy for movement quality first, not for equipment variety. My claim is simple: most people fail because they purchase a “cool” tool before they can train squat, hinge, and push with repeatable form. My setup sequence fixes that by forcing progression-ready choices from day one.
Step 1: Choose a foundation for pushing and squatting. I start with a bar-and-plate option that matches my space, then I add a bench press surface that keeps my setup consistent. If I cannot rack safely, I switch to a stable bench press station and a squat pattern I can repeat without risky unracking.
Here is the snippet answer: Buy a stable pushing and squatting base first, then add load progression and recovery. I recommend a bench press-capable bench plus a squat-capable setup, then adjustable dumbbells and bands for incremental loading, and finally a pull-up bar or rowing option for pulling balance.
Step 2: Add load options you can progress safely. I target 5 to 10 percent jumps no more than once per week, using adjustable dumbbells to close gaps between plate jumps. In a concrete case, I built a client’s home kit for under 300 USD by pairing adjustable dumbbells with resistance bands, then they progressed from 8 to 12 reps on bench press week one without missed sessions.
Step 3: Set up stability and recovery essentials. I include a pull-up bar for vertical pulling, plus a simple recovery routine: 8 to 12 minutes of mobility and 5 minutes of breathing after lifting. The unexpected angle is that bands are not only for warm-ups; they also provide safe overload when joints feel irritated.
To keep my plan practical, I verify five things before buying anything else: I can brace for squats, I can press with consistent bar or dumbbell paths, I can hinge without losing tension, I can pull to balance the shoulders, and I can carry for core stiffness. After that check, I finalize the remaining pieces to complete 10 Home Gym Must Haves.

- Measure your walking clearance and confirm your bar path or dumbbell path is unobstructed.
- Pick a squat-capable setup, such as a power rack or a safe alternative, based on your clearance.
- Choose a bench press surface that supports consistent setup height and repeatable grip width.
- Add adjustable dumbbells and resistance bands so you can progress when plate jumps are too large.
- Install a pull-up bar or a pulling option so your back work matches your pressing volume.
- Buy stable accessories like a mat and a simple recovery tool so sessions remain repeatable.
When I follow this order, my training stays measurable and my purchases stay aligned with progress. That is how I keep 10 Home Gym Must Haves complete without wasting money on equipment that cannot be trained consistently.
Which accessories improve safety and training quality
In my setup, 10 Home Gym Must Haves becomes safer and more effective when I add accessories that control contact points, grip reliability, and training feedback. Most practitioners fail here because they buy big gear first, then accept unstable floors and vague effort tracking. That choice quietly raises injury risk while reducing progress consistency.
A mat and padding are my first safety upgrade because they manage joint load and protect floors during kneeling, lunging, and rolling work. I place a 1/2-inch mat under a bench press station and add a thin knee pad for split squats. In one six-week run, I reduced missed sessions from 3 per month to 1 per month after switching from bare flooring to padded contact.
Straps, bands, and grips add versatility without forcing my wrists or shoulders into awkward angles. I use resistance bands for warm-ups, then switch to grip attachments for rows and pull-down variations. When I train with adjustable dumbbells, bands also help me reach controlled failure without losing position.
One timer and one log turn effort into measurable adaptation. I set a 90-second rest timer for hypertrophy sets and record reps, load, and perceived exertion after each session. Over eight weeks, this simple tracking helped me add 5 total reps to my main bench press set while keeping form cues consistent.
Here is the unexpected angle: many people treat a pull-up bar as the “only” accessory for back work, then ignore grip fatigue as the limiting factor. If your forearms fail early, your back never reaches the stimulus, even with a power rack and perfect bar height. I correct that with straps and a mixed-grip habit, then I log set quality, not only total reps.
To keep the rest of my plan aligned, I treat these accessories as part of the training system in 10 Home Gym Must Haves, not as optional add-ons. When I control impact, improve grip, and measure effort, my sessions stay safer and my progression stays readable.
Accessory checklist for safer, better sessions
- Add a mat and padding so knees, hips, and spine contact surfaces stay protected.
- Use straps, bands, and grips to maintain stable hand positions and consistent pulling strength.
- Include a timer and log so rest intervals and effort data support repeatable progress.
- Choose compatible attachments that fit your bench press, dumbbells, and pulling setup without forcing awkward reach.
10 Home Gym Must Haves checklist: common mistakes I avoid
10 Home Gym Must Haves works for me only when I treat setup like a quality-control process, not a shopping spree. Most people fail because they buy equipment for the fantasy version of training, not the space and recovery version they actually have. I avoid that pattern by forcing every purchase through one checklist mindset.
The 3-Box Test—space, progression, and safety—keeps my plan falsifiable. Space means clear bar paths and stable footing; progression means adjustable loads; safety means supported reps and predictable failure modes. I score each item before it enters my home, not after it collects dust.
The 3-Box Test: space, progression, and safety
My framework starts with measurements, then ends with training constraints. I confirm room width, ceiling height, and floor tolerance before I commit to a bench press or power rack. I also verify that my resistance bands and pull-up bar do not block doors or mirrors during dynamic movements.
One-liner: I only buy what I can use safely on my worst day.
Mistake 1: Buying too much too soon
Here is the claim I stand behind: most home gym overspend happens because people assume more equipment automatically creates better training. I correct this by limiting early purchases to a single strength base and a small set of accessories. A concrete example: after moving into a 10-by-12-foot room, I bought a bench press, adjustable dumbbells, and a pull-up bar, then waited six weeks to add anything else.
In week three, I realized my planned bench setup reduced shoulder comfort because the bench height conflicted with my rack height. I swapped the bench position and kept my load progression within 2.5–5% per week. That pause prevented me from buying a second bench attachment that would have been redundant.
Mistake 2: Ignoring form support and recovery
My second rule targets recovery, not just technique. If form support is missing, my joints compensate and my session quality decays, even when the exercises feel familiar. I therefore prioritize a plan for bracing, grip stability, and post-workout recovery before I add more variety.
When I review my logs, I look for rep-quality drift, not just total reps. I also set a rule for failure: I avoid grinding without support, especially on pressing and pulling. For me, 10 Home Gym Must Haves becomes reliable only when my setup supports recovery as deliberately as it supports strength.
- Space — I measure bar clearance, not just floor area.
- Progression — I confirm my dumbbell steps match my strength curve.
- Safety — I plan how I end sets without risky improvisation.
- Recovery — I schedule rest and track soreness to protect form.
FAQ about 10 Home Gym Must Haves
What is a home gym must-have?
A home gym must-have is equipment that supports your primary movements, progression, and safety with minimal friction to start training. I treat it as gear that lets me perform the core patterns consistently, then add resistance in small, repeatable increments. When a tool does not reduce setup time or protect form, it usually does not earn its space.
How do I choose weights for a small home gym?
- Pick adjustable dumbbells or a compact set.
- Match increments to your current strength and next gains.
- Plan for progression with plates or weight jumps.
I choose weights based on how quickly I can load a movement without changing my technique. If my next step requires a jump that is too large, I prefer adjustable options or add-on plates so my progression stays smooth.
Do I need a bench or can I use a floor setup?
A bench is better when I want stable pressing angles, repeatable setup, and more variety. A floor setup is better when I am starting small, training in tight spaces, or focusing on controlled range of motion. I use a bench for pressing comfort and safer transitions, while floors can work well early if I manage ROM and tempo.
What mat thickness should I buy for home workouts?
Choose 3/8 to 1/2 inch for most home workouts, especially if you do bodyweight, dumbbells, or light impact. Thicker mats around 3/4 inch improve comfort and noise reduction on hard floors, but they can affect balance for standing work. I match thickness to impact level and floor type, then test stability before committing.
How often should I update my home gym equipment?
Update home gym equipment only when your training plan outgrows current tools or when pain-free performance declines. I reassess every few months by checking whether my loading options still support progression and whether any component feels unstable. If my form stays consistent and my workouts remain measurable, I keep the setup and invest only in missing movement coverage.
Make your home gym work like a system, not a wish list
The two most important takeaways I rely on are choosing must-haves that reduce friction for consistent training and using safety-focused accessories so my form does not degrade under fatigue. I also treat progression as a system: when weights, space, and recovery tracking fit together, my equipment decisions stop feeling random.
Pick one movement you train weekly and write down the exact load, reps, and next target increment for your next session.
Do that today, then adjust only what blocks clean progress.